Install Nginx With PHP And MySQL On CentOS 7
Nginx is a free, open-source, high-performance HTTP server and reverse proxy, as well as an IMAP/POP3 proxy server. Nginx is known for its high performance, stability, rich feature set, simple configuration, and low resource consumption. This tutorial shows how you can install Nginx on a CentOS 7 server with PHP support (through PHP-FPM) and MySQL (Mariadb) support.
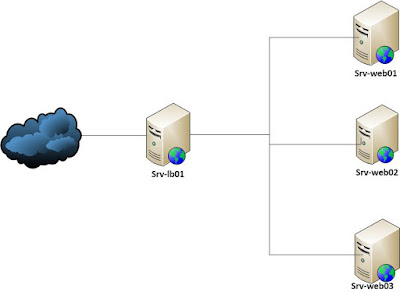
In this tutorial i use hostname srv-web01.nginx.vn with the ip address 10.11.218.251.
Step 1: Additional Repositories and install Nginx
To get the lastest version of Nginx, we add nginx yum repository, create a file named/etc/yum.repos.d/nginx.repo and paste one of the configurations below:
[nginx]
name=nginx repo
baseurl=http://nginx.org/packages/centos/$releasever/$basearch/
gpgcheck=0
enabled=1
We can install as follows:
yum install nginx
Then we create the system startup links for nginx and start it:
systemctl enable nginx.service
systemctl start nginx.service
And open the http and https ports in the firewall:
firewall-cmd –permanent –zone=public –add-service=http
firewall-cmd –permanent –zone=public –add-service=https
firewall-cmd –reload
Step 2: Install MySQL (MariaDB)
Now we will install MariaDB, a MySQL drop-in replacement. MariaDB is a community-developed fork of the MySQL relational database management system. Basically, it will organize and provide access to databases where our site can store information.
yum install mariadb mariadb-server net-tools
Then we create the system startup links for MySQL (so that MySQL starts automatically whenever the system boots) and start the MySQL server:
systemctl enable mariadb.service
systemctl start mariadb.service
Now that our MySQL database is running, we want to run a simple security script that will remove some dangerous defaults and lock down access to our database system a little bit. Start the interactive script by running:
mysql_secure_installation
This will remove some sample users and databases, disable remote root logins, and load these new rules so that MySQL immediately respects the changes we have made.
Step 3: Install PHP
– PHP is the component of our setup that will process code to display dynamic content. It can run scripts, connect to our MySQL databases to get information, and hand the processed content over to our web server to display.
– We can make PHP work in nginx through PHP-FPM . We can install php-fpm together with php-cli and some PHP modules like php-mysql which need to use MySQL from PHP scripts as follows:
yum install php-fpm php-cli php-mysql php-gd php-ldap php-odbc php-pdo php-pecl-memcache php-pear php-mbstring php-xml php-xmlrpc php-mbstring php-snmp php-soap php-common php-devel
– APC is a free and open PHP opcode cacher for caching and optimizing PHP intermediate code. It’s similar to other PHP opcode cachers, such as eAccelerator and Xcache. It is strongly recommended to have one of these installed to speed up your PHP page.
yum install php-pecl-apc
Now we create the system startup links for php-fpm and start it:
systemctl enable mariadb.service
systemctl start mariadb.service
PHP-FPM is a daemon process (with the init script /etc/init.d/php-fpm) that runs a FastCGI server on port 9000.
Configure the PHP Processor
Open /etc/php.ini and set cgi.fix_pathinfo. Default, it set to “1”. This is an extremely insecure setting because it tells PHP to attempt to execute the closest file it can find if a PHP file does not match exactly. This basically would allow users to craft PHP requests in a way that would allow them to execute scripts that they shouldn’t be allowed to execute. Then we set cgi.fix_pathinfo=0
PHP-FPM is listening on port 9000 on 127.0.0.1 by default, therefore nginx to connect to127.0.0.1:9000 with the line fastcgi_pass 127.0.0.1:9000; we also possible to make PHP-FPM use a Unix socket by configuration below:
vim /etc/php-fpm.d/www.conf
listen = /var/run/php-fpm/php-fpm.sock
listen.owner = nginx
listen.group = nginx
listen.mode = 0660
Reload php-fpm service:
systemctl reload php-fpm.service
Note: if your webserver runs as as user other than nginx, you will need to update the www.conf file accordingly
Step 4: Configuring Nginx
Edit the nginx main configuration file:
vi /etc/nginx/nginx.conf
For more information on configuration, see Official English Documentation:http://nginx.org/en/docs/
First, we can increase the number of worker processes and set the keepalive_timeout to a reasonable value. To use the correct amount of worker_processes. It should be equal to the amount of CPU cores:
cat /proc/cpuinfo | grep processor |wc -l
In this example, we have 8 CPU cores then set worker_processor to 8. The error_log and access_log settings indicate the default logging locations.
The last setting we are concerned with is the include directive for the sites-enabled directory. Inside /etc/nginx, we’ll see two other directories, /etc/nginx/sites-available and /etc/nginx/sites-enabled. For each Web site we want to host with Nginx, we should create a config file in /etc/nginx/sites-available, then create a symlink in /etc/nginx/sites-enabled that points to the config file created. The main Nginx config file includes all the files in /etc/nginx/sites-enabled. This helps organize configuration files and makes it very easy to enable and disable specific Web sites.
#mkdir /etc/nginx/sites-available/
#mkdir /etc/nginx/sites-enabled/
Let’s modify the nginx main configuration file as follows:
user nginx;
worker_processes 8;

error_log /var/log/nginx/error.log warn;
pid /var/run/nginx.pid;
events {
worker_connections 1024;
}
http {
     include /etc/nginx/mime.types;
     default_type application/octet-stream;
     log_format main '$remote_addr - $remote_user [$time_local] "                      $request" ''$status $body_bytes_sent "$http                      _referer" ''"$http_user_agent" "$http_x_for                      warded_for"';
     access_log /var/log/nginx/access.log main;
     sendfile on;
     #tcp_nopush on;
     keepalive_timeout 65;
     gzip on;
     include /etc/nginx/sites-enabled/*;
}
Configure Nginx to Process PHP Pages
We need to make some changes to this file for our site.
- First, we need to add an index.php option as the first value of our index directive to allow PHP index files to be served when a directory is requested
- We also need to modify the server_name directive to point to our server’s domain name or public IP address
- We will also need to add a try_files directive to make sure Nginx doesn’t pass bad requests to our PHP processor
Now, we create a new config file for a virtual host (website) to use our PHP for dynamic content.
Create a new configuration file called /etc/nginx/sites-available/nginx.vn with the following contents:
server {
    listen       80;
    server_name  nginx.vn;
    root /var/www/nginx.vn;
    index index.php index.html;
    error_log /var/log/nginx/nginx.vn-error.log;
    # redirect server error pages to the static page /50x.html
    #
    error_page   500 502 503 504  /50x.html;
    location = /50x.html {
        root   /usr/share/nginx/html;
    }
    #
    location ~ \.php$ {
        try_files $uri =404;
        #fastcgi_pass 127.0.0.1:9000;
        #make PHP-FPM use a Unix socket
        fastcgi_pass unix:/var/run/php-fpm/php-fpm.sock;
        fastcgi_index  index.php;
       #fastcgi_param  SCRIPT_FILENAME  /scripts$fastcgi_script_name;
        fastcgi_param  SCRIPT_FILENAME  $document_root$fastcgi_script_name;
        include        fastcgi_params;
    }

    # deny access to .htaccess files, if Apache's document root
    # concurs with nginx's one
    #
    location ~ /\.ht {
        deny  all;
    }
}
Create the root directory and info.php file:
# mkdir /var/www/nginx.vn
# cd /var/www/nginx.vn
#vim /var/www/nginx.vn/info.php
<?php
phpinfo();
?>
Enable the site and restart Nginx:
# cd /etc/nginx/sites-enabled
# ln -s ../sites-available/nginx.vn .
#systemctl restart nginx.service
Open your web browser and go to http://10.11.218.251/info.php
Comments
Post a Comment